Import shipments
This article describes how you can upload shipments in batch into Transmate using a CSV upload file, The shipment upload lets you map columns to Transmate fields and values.
Workflow
Download CSV template (link)
Enter your data in the csv template
Navigate to app.transmate.eu/shipments
Click on the import button in the footer
Upload the file and hit submit
Check the field mapping
Click process
Upload template
An example CSV template can be downloaded here: link). However, the shipment import allows you to map any template to the Transmate fields after uploading. If you have a download from your CSV with at least the minimal fields this will do (see minimal fields).
minimal required columns:
reference columns: that is a unique identifier of at least 5 characters, unique per shipment. Note, if multiple lines have the same identifier. The code will consider it the same shipment, combining the lines in a single generated shipment
item quantity: the amount of a shipping item
item unit: the unit of measurement, or the equipment or the handling unit of the shipping item
planned pickup date
planned arrival date
from location
to location
The location should either by mapped to an input string (that will be geo validated) or the separate address fields.
NOTE: passing in both an address input AND the individual fields will result in an error
NOTE: the header fields can be chosen freely, we will map that in the next step.
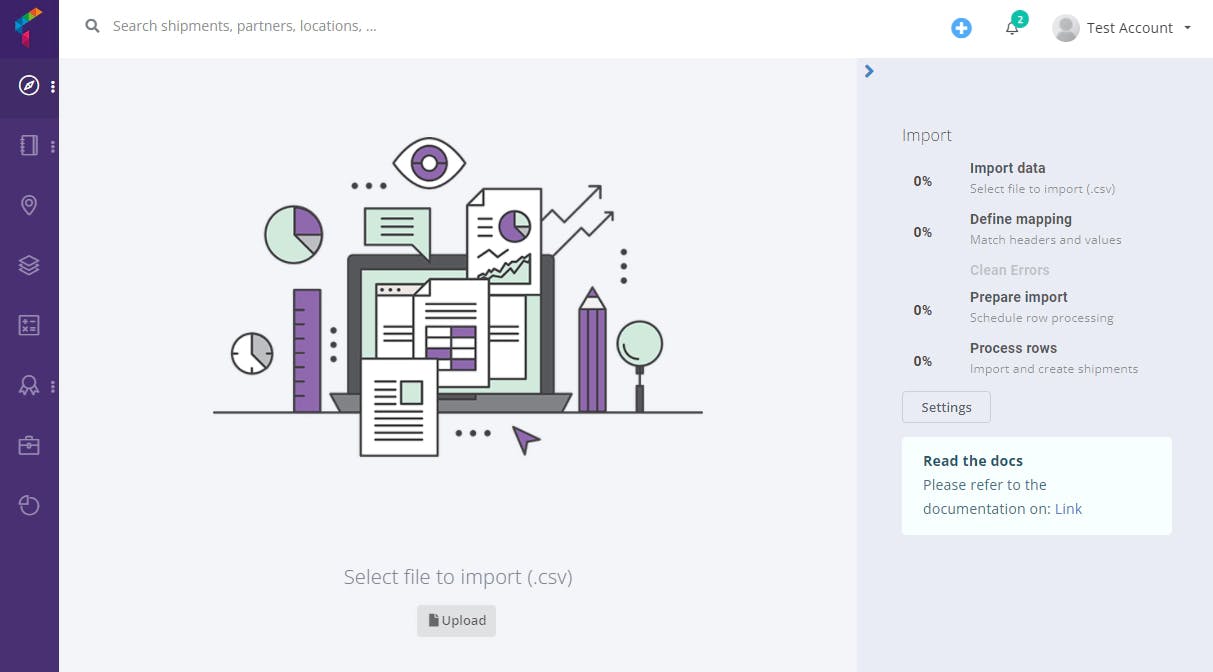
To start, select the file button and select the CSV template you have filled. The file will automatically be read, parsed, and send to the server. You should be redirected to the mapping screen
Mapping
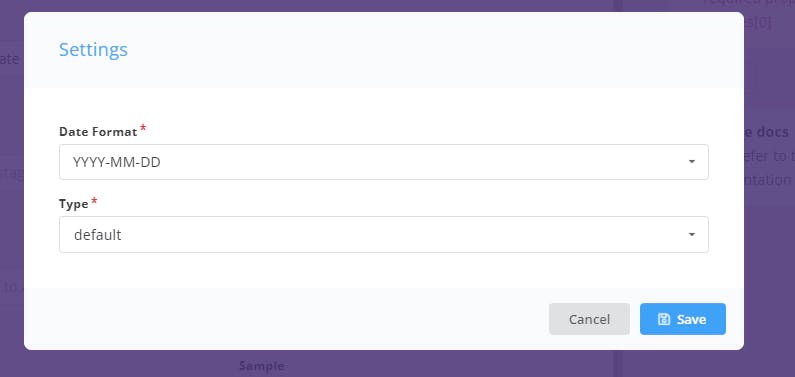
The uploader will read through the upload fields and try to make a guess which fields are mapped. You can select a mapping type through the settings button on the right-hand side. The mapping type allows you to have different upload templates that can each have a different mapping. Also, in the settings modal, choose the date format your data is in.
All fields that have been found at the upload file will be listed in the mapping overview. Verify the field map
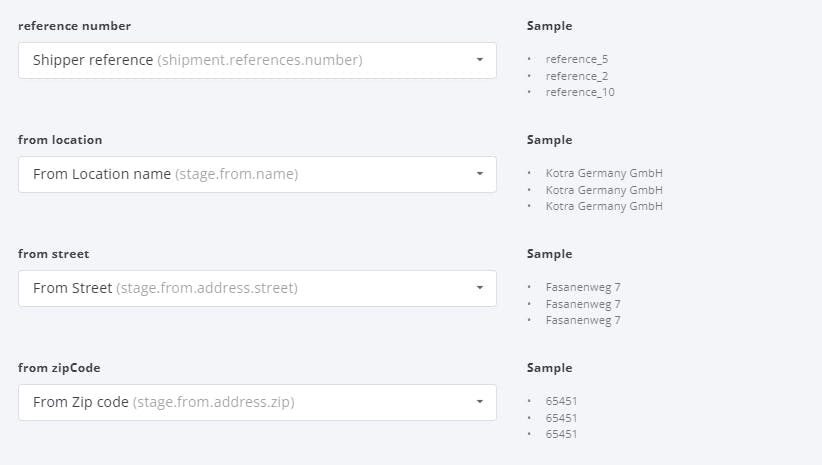
The label indicates the header as found in your upload template. For example; the field "from zipCode" was found and recognized to be equal to the "stage.from.address.zip" field in Transmate. This is shown in the dropdown value. On the right-hand side, some sample data is listed to verify that the fields are correctly mapped.
You can modify the mapping for each column, This can be done by clicking in the dropdown and selecting the right Transmate field:
screen: header mapping options
When you select, the change is automatically saved. Each time a mapping changes, the code will verify if all necessary fields are present and correctly mapped. This validation is shown on the right hand side.
Some fields require a value mapping as well. For example: the shipment type is such a field. In the app, this is a dropdown with several options. When uploading data, we need to know which option corresponds to what data value you have uploaded. Once you have selected a field that requires value mapping, all distinct values will be listed.
screen: value mapping on country
The screenshot above shows the value (Germany) that is being mapped to a country form the list of options. Once the corresponding value is selected, this is saved automatically.
Once all headers and values are correctly mapped the import can be processed. As long as there are errors, the button is disabled. You can verify the validation errors on the right hand side.
IMPORTANT: all fields can only be mapped
Validation Errors
When mapping the fields and values (see above), the data is constantly checked if it can be imported as a valid shipment. If it is not a valid shipment. it will be shown on the right:
validation errors
When the validation shows errors, the field and value mapping should be checked.
known errors:
LOCODE error: a field is mapped to a locode field (UN Location code) and is incorrect. Check if there is a mapping to either 'stage.from.locode' or 'stage.to.locode'. A locode should have 5 characters: 2 characters the country code and 3 characters the location identifier. If the value should not have been a location code, please select the correct value from the field options
... should be a valid date: a date field could not be parsed. Verify the format your date is in (e.g. DD-MM-YYYY) and select the corresponding format in the settings modal
... should have required property: a field is missing. Please add the mapping of this field.
When all validation errors are cleared, you can proceed by hitting the import button.
process button
When clicking on the process rows, you will be redirected to the import item overview
Processing the upload
Just after starting the process, each individual shipment (that is after grouping shipment based on reference numbers) will be listed here with the import status:
Shipment import process
The screen will automatically update on the import status of each item. If all items are correct, the shipmentId and link to the generated item will be shown. If there are errors, the items will disappear from the result tab and will become visible in the error list (click on the top of the page on the tab with errors)
screen: error overview.
You can hover over the red items to see a full error description. In the example, the country was not correctly mapped and could not be imported. The generated input is shown in the data column. Hovering over the data column will show the generated input that will be used to create the shipment.
Solving errors
So, the import went wrong. What can you do? - In the footer you will see a button that says 'revert import'.
revert import button
Reverting the import means:
Cancelling all background jobs that are processing shipment items for this import
If shipments were already generated, all shipment, stages and items will be removed
going back to the mapping screen
You can revert shipment when there are errors, or also when the shipments were successfully generated and you wanted to add additional fields, do a different mapping.
Generated shipments
All generated shipments will be listed in the results tab in the process overview screen. Generated items will be visible in the shipment overview screen.
For more advanced import features, please refer to the Transmate import API documentation here.